The Muscle Car Pre-Restoration Inspection Checklist – March Blog Series
Week 1: Structural & Rust Inspection
Restoring a classic muscle car starts from the ground up – literally. The first and most critical step is examining the car’s structural integrity and checking for rust. If the frame or body is severely compromised, your restoration might be over before it begins. In this first part of our Pre-Restoration Inspection series, we explain how to spot structural red flags and hidden rust issues.
Frame and Undercarriage Check
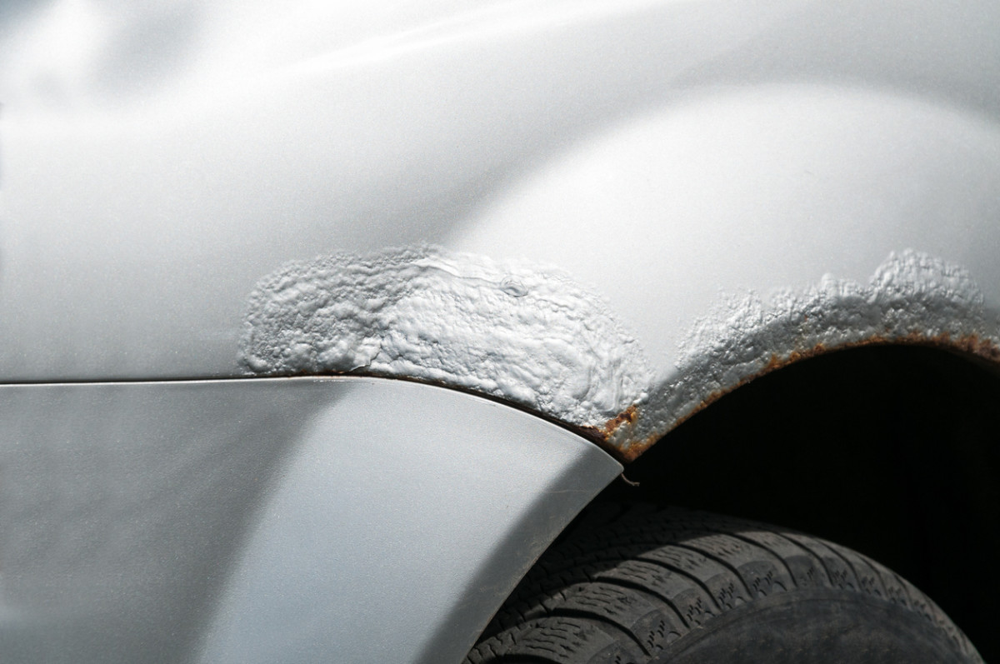
Begin by inspecting the frame and undercarriage. Look for any rust, cracks, or signs of prior damage along the frame rails, floor pans, trunk floor, and suspension mounting points. A solid frame is the foundation of any restoration – severe rot or bent frame sections can be deal-breakers unless you have the resources for extensive repairs. Surface rust vs. structural rust is a key distinction: surface rust (cosmetic) sits on top and does not significantly weaken the metal, whereas structural rust eats through supports and compromises the car’s strength.
For example, rust on a load-bearing area like a rocker panel or crossmember indicates deeper issues and potential safety risks if not addressed.
Tips:
Take a slow walk-around the car and use a bright flashlight to inspect underneath.
Carry a magnet – if it doesn’t stick uniformly to a panel, there might be filler hiding rust.
Check the car’s lower extremities: under doors, bottom of fenders, wheel wells, and the trunk floor are common rust hot spots.
Be wary of fresh undercoating or patchwork; they might be covering up rust or poor repairs.
Body Panels and Rust Hotspots
Next, examine all body panels and seams for rust or hidden damage. Pay special attention to spots where moisture gets trapped: rocker panels, wheel arches, around the windshield and rear window trim, and the bottoms of doors. Often, visible bubbling paint or rust on the outside means there’s worse corrosion concealed beneath. Open and close the doors, hood, and trunk – misaligned panels or doors that stick could indicate past accident damage or structural sagging. Use your magnet on quarters, fenders, and doors to detect excess body filler, a telltale sign of previous repair work.
If the car has a separate frame (body-on-frame construction), remember that both the frame and the body need a thorough inspection – a solid frame won’t matter if the body’s floorboards are rusted out, and vice versa. Extensive rust repair (like replacing floor pans or frame sections) can be very costly. As one classic car expert put it, “walk away unless you have time, patience and money to repair it properly” when major structural rust is found. This doesn’t mean every rusty project is doomed, but you must budget for repairs or consider a different car if the structure is too far gone.
Recap/Next: Ensuring the skeleton of your muscle car is solid will save you countless headaches down the road. Now that we’ve confirmed the car isn’t a rusted-out shell, it’s time to move on. Next week, we’ll pop the hood and dive into the drivetrain and electrical systems – the heart and nerves of your muscle car restoration.